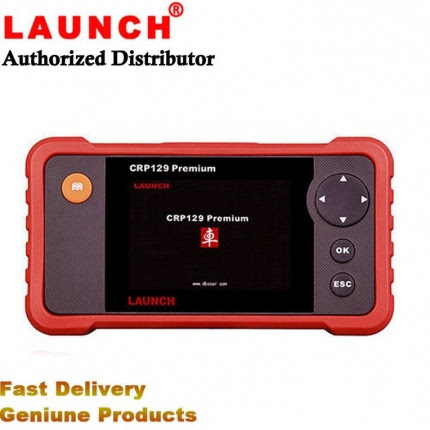
LAUNCH Creader CRP129 Premium Code Reader Scan Tool OBD2 Engine ABS SRS EPB SAS
Comparation with previous version CRP129
1.Bigger screen, better views of graphs and more, upgraded from 3.5″ to 4″
2.Bigger memory, faster, better, upgraded from 1GB to 8GB
3.Upgraded hardware, add handle, bigger buttons, improved irreconcilability, much easier to operation.
4.Add more vehicle models as followings: Mahindra,Maruti,Suzuki,Tata,Fiat(Brazil),HOLDEN
Languages: English, Spanish, French, German, Italian, Russian and Polski.
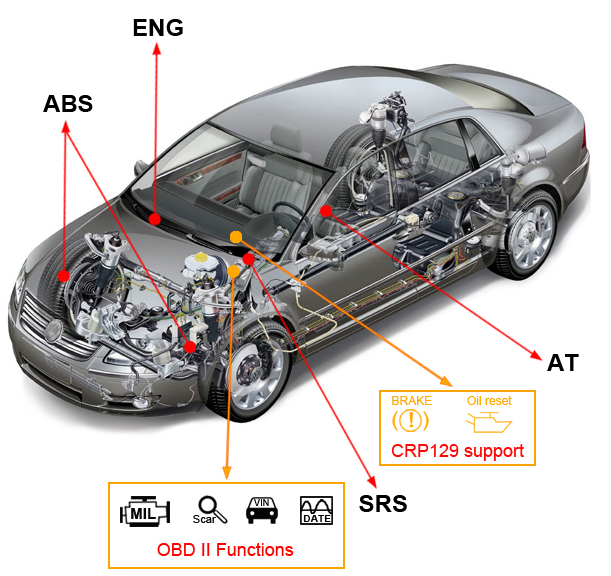
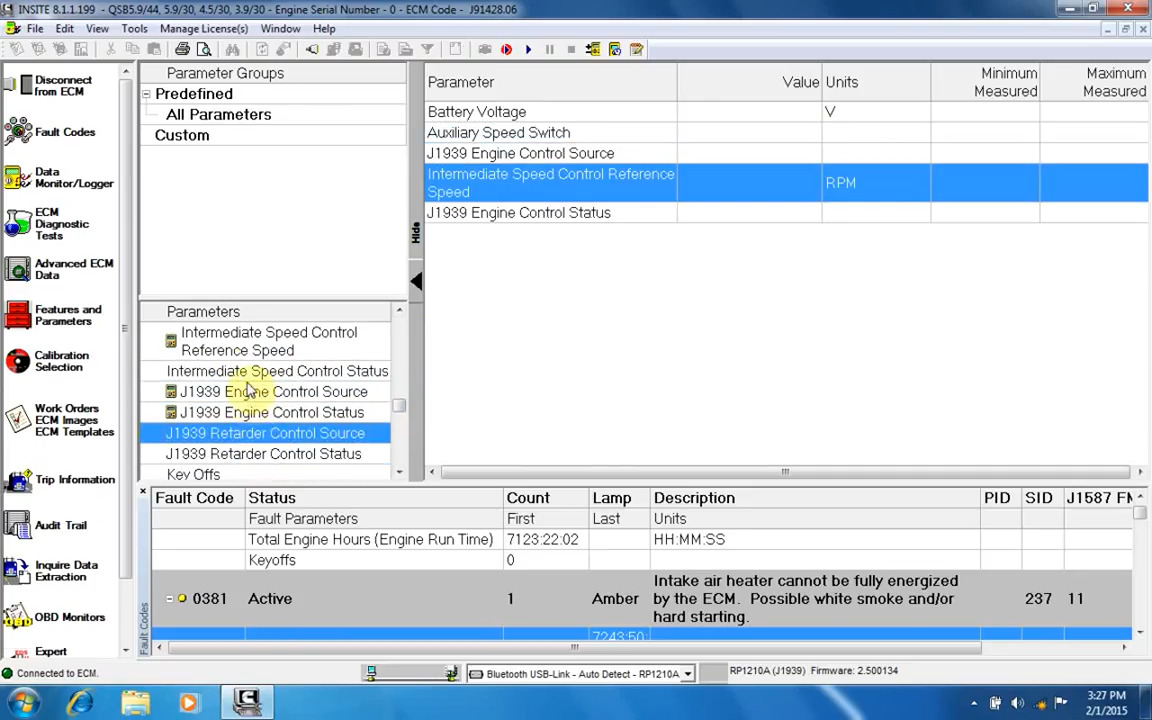
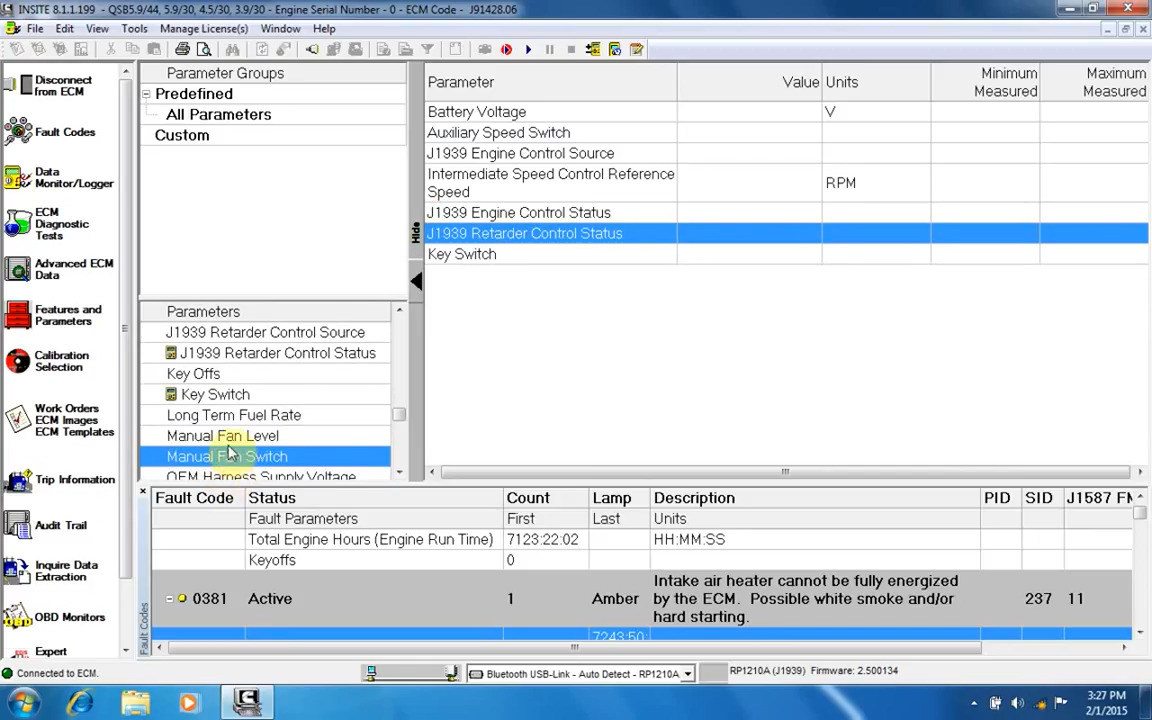
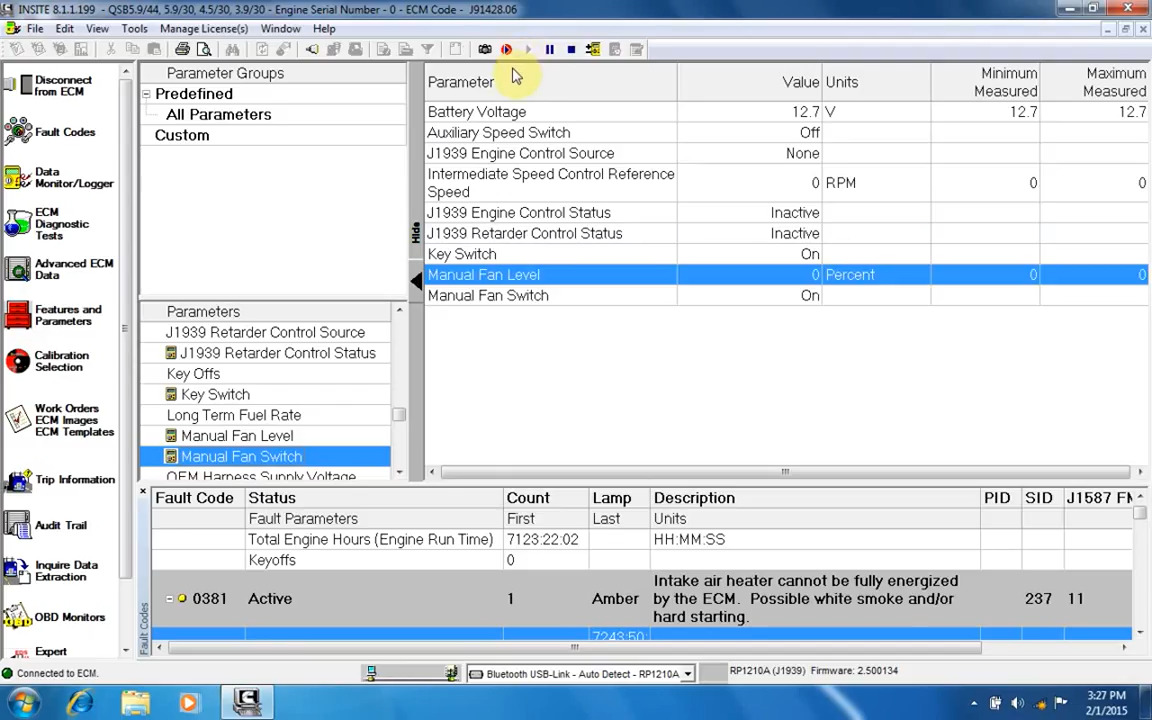
It supports all of the 10 modes of OBD II test and is able to diagnose the 4 main systems of worldwide main stream models Engine,Transmission ABS and Airbag(SRS), which helps automobile repair professionals dianose and repair vehicles more efficiently,accurately and profitably.
In addition,the CRP129 Premium also supports Electronic Parking Brake (EPB) release,Steering Angle Sensor(SAS) and Oil Servide Light resets etc.
More new systems and functions will be available frequently .
Electronic Parking Brake (EPB) release . Steering Angle Reset. Oil Service Reset. ABS& Airbag(SRS) System.Transmission & More
Works with all vehicles compliant with EOBD/OBDII (most vehicles after 1996).
Go resets special functions, go for CRP129 Premium. It’s a marked improvement of its predecessor, as well as being the world’s first DIY diagnosis product with fully integrated OBDII, Car Model Diagnosis and Engine Oil Lamp Reset.
It also has the ability to record, retain and playback hours of diagnostic data, allowing you to re-examine the date you have collected at a later stage as well as compare the correlated information of multiple instances.
The I/M readiness test shows whether the various emissions-related systems on the vehicle are operating properly and are ready for Inspection and maintenance testing.
Functions of the CRP129 Premium include:
1.MIL Indicator
2.Multiple car models (Over 40 prevalent models from Asia, America & Europe)
3.Record, save and playback up to 8 hours of live data
4.I/M readiness test
5.Enhanced data stream for ABS, SRS, transmission & engine.
6.Malfunction lamp status
7.Read vehicle information (VIN, CIN and CVN)
8.O2 (Lambda) sensor test
9.Auto-vehicle ID, Auto Module Search & ultra-fast protocol ID
10.EVAP system test
11.View live diagnostic data in graph or data format
12.View multiple data streams at the same time
13.View freeze frame data
14.Read current, pending and permanent DTC’s
15.Clear DTC’s
16.Support DTCs help, data stream wave display,
17.Internet updateable
18.Enhanced help function
19.Print data via PC
20.RESET BRAKE (EPB)
21.RESET OIL LAMP
22.RESET SAS (Steering Angle Reset)
23.RESET BMS (Battery Management System)
Support Vehicle:
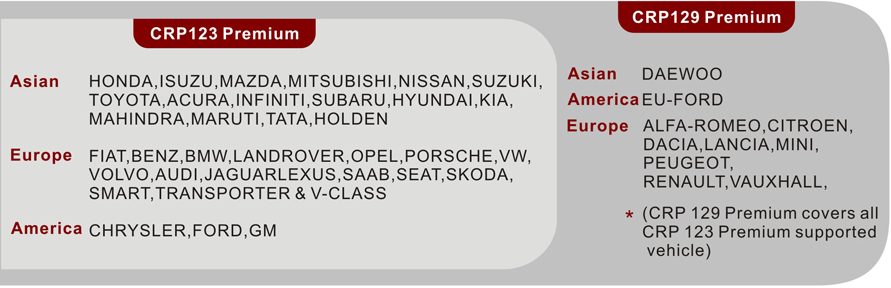
Asia car models:Suzuki, Honda, Mitsubishi, Nissan, Toyota, Mazda, Daweoo, Hyundai, Kia, Subaru, Infiniti, Lexus, Accura ,Isuzu, Daihatsu, Mahindra,maruti,Tata,
USA car models:Ford, EU-Ford, GM, Chrysler,Fiat(Brazil)
EUROPEAN car models:Mini, Vauxhall, Dacia, Alfa-Romeo, Lancia, Peugeot, Renault, Citroen, Benz, BMW, VW, Opel, Volvo, Fiat, Landrover, Porsche, Seat, Skoda, Audi, Saab, Sprinter, Jaguar
AUSTFORD:HOLDEN
Specification:
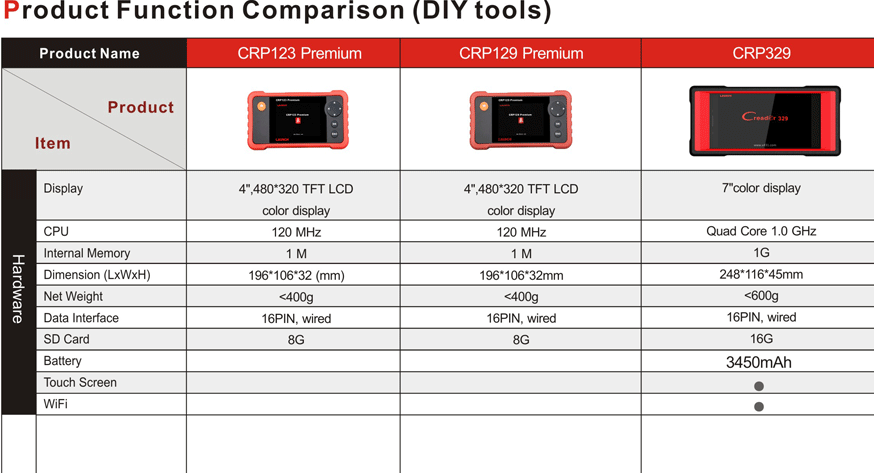
1.4” TFT LCD True Color Screen
2.Input voltage range 9-18V
3.Standard 16 Pin OBD interface
4.Connection: Standard 16PIN OBD Diagnostic Interface
5.Dimensions: 7.7” x 4.17” x 1.25” (L x W x H)
6.Language options: English, Spanish, French.
7.Weight: <400g
The CReader Professional 129P is both flexible and practical, making it a must have diagnosis tool for any and all car enthusiasts.
This product comes with an access to valuable software updates which are released by Launch over the internet.
Warranty:
One year standard warranty.
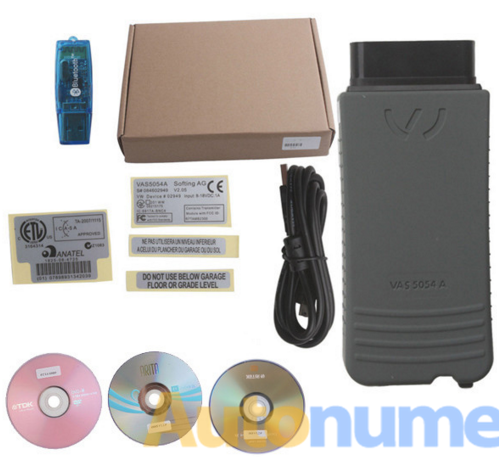
Package List:
1pc x Launch X431 Crp129 premium code reader
1pc x OBDII cable
1pc x USB Cable
1pc x USB Sticker
1pc x Carrying box


